1 Product basics
ENWW 1
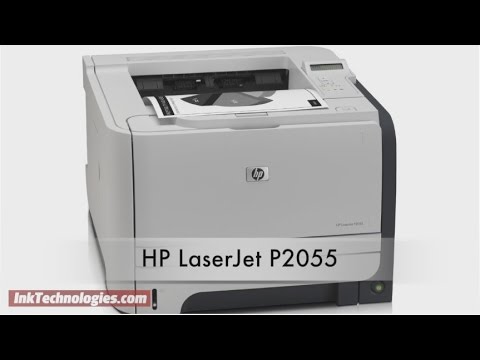
Product comparison
HP LaserJet P2050 Series models
![]()
HP LaserJet P2055 printer HP LaserJet P2055d printer HP LaserJet P2055dn printer HP LaserJet P2055x printer
CE456A CE457A CE459A CE460A

- Prints up to 35 pages per minute (ppm) on Letter size paper and 33 ppm on A4 size paper
- Contains 64 megabytes (MB) of random access memory (RAM) and is expandable to 320 MB.
- HP print cartridge, rated for up to 2,300 pages
- Tray 1 holds up to 50 sheets
- Tray 2 holds up to 250 sheets
- 125-sheet face-down output bin
- Straight-through output path
- 2-line control-panel display
- Hi-speed USB 2.0 port
- One open dual inline memory module (DIMM) slot
Has the same features as the HP LaserJet P2055 model printer, plus the following:
- Two-sided printing (duplexing)
Has the same features as the HP LaserJet P2055d model printer, plus the following:
- HP Jetdirect Standard Gigabit Ethernet embedded print server
- Contains 128 MB RAM and is expandable to 384 MB.
![]()
Has the same features as the HP LaserJet P2055dn model printer, plus the following:
- Additional 500-sheet tray (Tray 3)
2 Chapter 1 Product basics ENWW
Product features
![]()
● The product checks for an authentic HP print cartridge at installation.
● Integration with HP Sure Supply Web site for easy replacement-cartridge reordering![]()
ENWW Product features 3
| Feature | Description | |
| Supported operating systems | ● | Microsoft® Windows® 2000, Windows® Server 2003, Windows® XP, and Windows Vista™ |
| ● Macintosh OS X V10.3, V10.4, V10.5, and later | ||
| ● | Novell NetWare | |
| ● | Unix® | |
| ● | Linux | |
| ● | Citrix | |
| Accessibility | ● | The online user guide is compatible with text screen-readers. |
● The print cartridge can be installed and removed by using one hand.
● All doors and covers can be opened by using one hand.
● Paper can be loaded in Tray 1 by using one hand.![]()
4 Chapter 1 Product basics ENWW
Product walkaround
Front view

![]()
- Tray 1 (pull to open)
- Top output bin
- Control panel
- Print-cartridge-door release button
- On/off switch
- Optional Tray 3 (included with the HP LaserJet P2055x printer)
- Tray 2
- Print-cartridge door
![]()
ENWW Product walkaround 5
Rear view
 ZZZ
ZZZ
![]()
- Jam-release door (pull the green handle to open)
- Straight-through paper path (pull to open)
- DIMM cover (provides access to the DIMM slot)
- Interface ports
- Rear duplex jam-release door (duplex models only)
- Power connection
- Slot for a cable-type security lock
![]()
6 Chapter 1 Product basics ENWW
Interface ports

![]()
![]()
![]() 1
1![]()
![]()
2![]()
- Hi-speed USB 2.0 connection, for connecting directly to a computer
- RJ.45 network connection (network models only)
![]()
Model and serial-number label location
The label that contains the model and serial numbers is on the outside of the rear output (straight-through paper path).
ENWW Product walkaround 7
8 Chapter 1 Product basics ENWW
2 Control panel
ENWW 9
Control-panel layout
Use the control panel to obtain product and job status information and to configure the product.
| Number | Button or light | Function |
| 1 | Control-panel display | Shows status information, menus, and error messages |
| 2 | Up arrow | Navigates to the next submenu or the next value in a menu selection list, moves |
| the cursor forward a single position, or increases the value of numeric items | ||
| 3 | OK button | ● Saves the selected value for an item |
| ● Performs the action that is associated with the item that is highlighted on | ||
| the control-panel display | ||
| ● Clears an error condition when the condition is clearable | ||
| 4 | Down arrow | Navigates to the next item in the list, or decreases the value of numeric items |
| 5 | Back button | Backs up one level in the menu tree or backs up one numeric entry |
| 6 | Ready light | ● On: The product is online and ready to accept data to print. |
| ● Off: The product cannot accept data because it is offline (paused) or has | ||
| experienced an error. | ||
| ● Blinking: The product is processing a job. | ||
| 7 | Cancel button | Cancels the current print job |
| 8 | Error light | ● Off: The product is functioning without error. |
| ● Blinking: Action is required. See the control-panel display. |
![]()
![]()
![]()
![]()
10 Chapter 2 Control panel ENWW
Use the control-panel menus
To gain access to the control-panel menus, complete the steps below.
Use the menus
- Press OK.
- Press the down arrow
 or the up arrow to navigate the listings.
- Press OK to select the appropriate option.
- Press the back button
 to return to the previous level.
The following are the main menus.![]()
Main menus Reports
System setup
Service
Network config.![]()
ENWW Use the control-panel menus 11
Reports menu
Use the Reports menu to print reports that provide information about the product.![]()
12 Chapter 2 Control panel ENWW
System setup menu
Use this menu to establish basic product settings. The System setup menu has several sub-menus.
Each is described in the following table.![]()
![]()
![]()
ENWW System setup menu 13
| Menu item | Sub-menu item | Sub-menu item | Description |
| Courier font | Regular | Select a version of the Courier font. | |
| Dark | The default is Regular. | ||
| Display contrast | Medium | Adjust the contrast of the LCD. | |
| Darker | |||
| Darkest | |||
| Lightest | |||
| Lighter |
14 Chapter 2 Control panel ENWW
Service menu
Use this menu to restore default settings, clean the product, and activate special modes that affect print output.![]()
| Menu item | Description |
| Cleaning mode | Use this option to clean the product if you see toner specks or other marks on the |
| printed output. The cleaning process removes dust and excess toner from the paper | |
| path. | |
| When you select this item, the product prompts you to load plain paper in Tray 1 and | |
| then press OK to start the cleaning process. Wait until the process is complete. | |
| Discard the page that prints. | |
| USB speed | Sets the USB speed to High or Full. For the product to actually operate at high |
| speed, it must have high speed enabled and be connected to an EHCI host controller | |
| that is also operating at high speed. This menu item also does not reflect the current | |
| operating speed of the product. | |
| The default setting is High. | |
| Less paper curl | If printed pages are consistently curled, use this option to set the product to a mode |
| that reduces curl. | |
| The default setting is Off. | |
| Archive print | If you are printing pages that will be stored for a long time, use this option to set the |
| product to a mode that reduces toner smearing and dusting. | |
| The default setting is Off. | |
| Restore defaults | Resets all customized settings to the factory default values. |
ENWW Service menu 15
Network config. menu
Use this menu to establish network configuration settings.![]()
| Menu item | Description | |
| CFG TCP/IP | Access the TCP/IP menu and set TCP/IP protocol parameters. | |
| ● BOOTP=YES* Enable IPv4 configuration by a BOOTP Server. | ||
| ● DHCP=YES* Enable IPv4 configuration by a DHCP Server. | ||
| If DHCP=YES* and the print server has a DHCP lease, you can configure the following DHCP | ||
| settings: | ||
| ● RELEASE: Select whether to release (YES) or save (NO) the current lease. | ||
| ● RENEW: Select whether to renew (YES or NO) the lease. | ||
| AUTO IP=YES* Automatically assign a link-local IPv4 address in the form 169.254.x.x. | ||
| If you specify BOOTP=NO*, DHCP=NO* and AUTO IP=NO*, you can manually set the following | ||
| TCP/IPv4 parameters from the control panel: | ||
| ● Each byte of the IPv4 address (IP) | ||
| ● | Subnet Mask (SM) | |
| ● | Syslog Server (LG) | |
| ● | Default Gateway (GW) |
● Idle Timeout period (default is 270 seconds, 0 disables the timeout) CFG DNS 1: IPv4 address of a primary DNS server (one byte at a time). CFG DNS 2: IPv4 address of a secondary DNS server (one byte at a time). IPV6 = YES*: Enable IPv6 operation. Select NO to disable IPv6 operation. POLICY=RTR_AV/RTR_UN/ALWAYS: Set one of the following IPv6 addressing policies:
● RTR_AV: (default) Stateful auto-configuration method is determined by a router. The router specifies whether the print server obtains its address, configuration information, or both from a DHCPv6 server.
● RTR_UN: Attempt to obtain stateful configuration from a DHCPv6 server (when a router is not available).
● ALWAYS: Always attempt to obtain stateful configuration from a DHCPv6 server (whether or not a router is available).
MANUAL= KEEP/DISABLE: Set the behavior of a manually configured IPv6 address detected on the print server.
● KEEP (default): Maintain the address in an active state.
● DISABLE: Maintain the address but in an inactive state.
Print an HP Jetdirect configuration page to verify your settings. (The print server can overwrite selected parameters with values that ensure proper operation.)![]()
16 Chapter 2 Control panel ENWW
ENWW Network config. menu 17
18 Chapter 2 Control panel ENWW
3 Software for Windows
ENWW 19
Supported operating systems for Windows
The product supports the following Windows operating systems:
- Windows XP (32-bit and 64-bit)
- Windows Server 2003 (32-bit and 64-bit)
- Windows 2000 (driver only)
- Windows Vista (32-bit and 64-bit)
Supported printer drivers for Windows
- HP PCL 5 Universal Print Driver (HP UPD PCL 5) (available for download from the Web)
- HP PCL 6 (on the product CD)
- HP postscript emulation Universal Print Driver (HP UPD PS) (available for download from the Web)
- XPS (XML Paper Specification) driver (available for download from the Web)
The printer drivers include online Help that has instructions for common printing tasks and also describes the buttons, checkboxes, and drop-down lists that are in the printer driver.
![]() NOTE: For more information about the UPD, see www.hp.com/go/upd.
NOTE: For more information about the UPD, see www.hp.com/go/upd.![]()
![]()
20 Chapter 3 Software for Windows ENWW
To read more please download the PDFs below
Download HP LaserJet p2055dn Manual
hp laserjet p2055dn driver
hp laserjet p2055dn service manual pdf
hp laserjet p2055dn manual ip configuration
hp laserjet p2055dn wireless setup
hp laserjet p2055dn setup
hp laserjet p2055dn printer
hp laserjet p2055dn specs
hp laserjet p2055dn scanner